Pages

Showing posts with label Chocolate. Show all posts

Thursday, September 18, 2014

Thursday Treats: Dangerous Peanut Butter Chocolate Chip Cookies {Pinterest--Nikki}


Dangerous Peanut Butter Chocolate Chip Cookies
{Pinterest Find}

1/2 cup butter, unsalted
1/3 heaping cup smooth peanut butter
1 cup brown sugar
1/2 cup white sugar
1 egg, room temperature
1 egg yolk, room temperature
2 tsp vanilla
2 cups flour
1/2 tsp baking soda
1/2 tsp salt
1+1/2 cup milk chocolate chips

--Oven Temp @ 325--

1. Melt the butter and peanut butter in a microwave safe bowl at 50% power until mostly melted. Remove from microwave and stir until the butter is completely melted and smooth, then set aside to let cool.
2. In a mixing bowl fitted with the paddle attachment (or using a wooden spoon), mix the cooled peanut butter and butter mixture with the sugars until fully incorporated. Beat in the egg, yolk and vanilla until combined.
3. In a separate bowl, whisk together the flour, baking soda and salt. Gradually add to the sugar/butter mix until a dough forms. Fold in the chocolate chips.
4. I used my cookie scoop to make evenly sized balls of dough and baked for 8-10 minutes. You don't want to over bake these.

These were so good, and got rave reviews by all who tried them. This is my favourite PB chocolate chip cookie and have made them at least 3 times now--with plans to make many more batches! :D

Visit Nikki at her blog, Seeded at the Table, for her post on these amazing cookies.


Enjoy!

Thursday, August 28, 2014

Thursday Treats: No-Cook Chocolate Fudge {Betty Crocker}


My friend Deb loves fudge more than any other dessert or sweet. She has a favourite recipe, but doesn't like baking very much--enter Elsa. This was the first time I made fudge, and wanted to test some recipes, so I began with this simple one from Betty Crocker's book. Her fiance really loved the book variation, but Deb swooned when she tried my second batch with my adjustments. Crocker's fudge is pretty good...but it lacked the richness and creamy smoothness of what you expect from fudge [my variations were an improvement, but I'm still on the search for great fudge!]. To me, it tasted like glorified semi-sweet chocolate chips. However, I did like her recipe in that you could eat more than just one tiny square and not get sick :D

I would say that this is a great first-timer's recipe to follow, but to me the taste didn't scream "FUDGE!". You decide!

No-Cook Chocolate Fudge
Betty Crocker Cookbook: 1500 Recipes for the Way You Cook Today
Betty Crocker
[Blue changes my modifications]

1 can [14 oz] sweetened condensed milk
1 bag [12 oz/2 cups] semisweet chocolate chips
[1+1/2 cups milk chocolate chips + 1/2 cup semisweet chocolate chips]
1 oz unsweetened baking chocolate, if desired
[Left out]
1 +1/2 cups chopped nuts, if desired
[Left out b/c Deb doesn't like nuts in her fudge, but would've used toasted pecan pieces.]
1 tsp vanilla

1. Grease bottom and sides of an 8-inch square pan with butter.

2. In a saucepan, heat the condensed milk, chocolate chips, and unsweetened chocolate over low heat, stirring constantly, until chocolate is melted and the mixture is smooth; remove from heat.

3. Quickly stir in the nuts and vanilla. Spread the fudge in the pan. Refrigerate about 1 hour and 30 minutes or until firm. Cut into 1-inch squares. Store in an airtight container.


Thursday, August 14, 2014

Thursday Treats: Chocolate Chip Zucchini Muffins {Flour + Inspired}

Remember the post of the best banana bread recipe of all time? And, I seriously mean "all time" :D The secret, in my opinion, is the use of very, very, very ripe bananas as well as the mixing technique. Anyway, my friend had given me a zucchini, and the only way I'll eat that veggie is in [sweet] bread form, so I decided to substitute zucchini for bananas in my favourite banana bread recipe.

Can anyone say superb? These were just as delicious and moist. Another keeper.


Flour's Famous Banana Zucchini Bread
Flour
Joanne & Elsa


1&1/2 c unbleached all-purpose flour
1 tsp. baking soda
1/4 tsp. ground cinnamon
1/2 tsp. kosher salt {I just used regular table salt}
1 c. plus 2 TBS sugar
1/2 c canola oil
1 large zucchini, finely grated [to peel or not to peel--that's up to you] and dried--you want very little liquid, if at all.
2 TBS creme fraiche or sour cream {I haven't made creme fraiche yet, so I just used sour cream}
1 tsp. vanilla extract
2 eggs
3/4 walnut halves, toasted and chopped {I left these out and added chocolate chips}


1. Position a rack in the center of the oven, and heat to 325 degrees F. Butter a 9x5in loaf pan. Or line standard muffin tins.

2. In a bowl, sift together the flour, baking soda, cinnamon, and salt. Set aside.

3. Using a stand mixer fitted with the whip attachment {or a handheld mixer}, beat together the sugar and eggs on medium speed for about 5 minutes or until light and fluffy. {If you are using a handheld mixer, this same step will take about 8 minutes}

4. On low speed, slowly drizzle in the oil. Don't pour the oil in all at once. Add it slowly so it has time to incorporate in the the eggs and doesn't deflate the air you have just beaten into the batter. Adding it should take about 1 minute. Add the zucchini, creme fraiche, and vanilla and continue to mix on low speed just until combined.

5. Using a rubber spatula, fold in the flour mixture and nuts{chocolate chips :D} just until thoroughly combined. No flour streaks should be visible and the nuts should be evenly distributed. Pour the batter into the prepared loaf pan and smooth the top.

6. Bake for 1 to 1&1/4 hours, or until golden brown on top and the center springs back when you press it. The muffins take 20-30 minutes depending on how much you fill the cups & the temperament of your oven :D If your finger sinks when you poke the bread, it needs to bake a little longer. Let cool in the pan on a wire rack for at least 30 minutes, and then pop it out of the pan to finish cooling.

7.The banana bread can be stored tightly wrapped in plastic wrap at room temperature for up to 3 days. Or, it can be well wrapped in plastic wrap and frozen for up to 2 weeks; thaw overnight at room temperature for serving.


Enjoy!


Thursday, April 3, 2014

Thursday Treats: Oatmeal CC-M&M + Oatmeal Raisin-Craisin Cookies {Betty Crocker}

Last Thursday, I made these soft, buttery Toffee Bars. In my haste, however, I mis-read the recipe and started off with a "whoopsie".


All was not lost though! I flipped through my cookbook, and just a couple pages after this scrumptious recipe, I found one that would work for my "mess-up"....

Ultimate Oatmeal Cookies! And, guys...I have been wanting to make Monster Oatmeal Cookies for a loooonnnnnngggggg time, so these were a wonderful variation! I took'em to church for a snack after our Bible study and prayer because I just knew I would eat all of'em...that night. They are absolutely delicious.


I made the recipe as is, until I got to the mix-ins. I divided the dough in half and added chocolate chips and M&M's to one, and raisins and craisins to the other!


I preferred the ones with chocolate...simply because they are yummier. I'm not a fan of fruit in my cookies, such as raisins, but mostly because of the texture. However, I have plenty of friends who would much rather prefer raisins to chocolate chips! I just call'em weird :D


Honestly though, the raisin/craisin cookies were much softer. I think it was because I had to boil my raisins...they had lost their plumpness sitting in their little snack-size cartons. I have no kids to eat them, and I have no idea what possessed me to buy them in the first place. Perhaps I was on a healthy-snacks-only kick.

Either way, they were put to good use and lent themselves to be quite useful in making my cookies soft :D


Ultimate Oatmeal Cookies
Betty Crocker

1+1/2 cups packed brown sugar
1 cup butter
1 tsp baking soda
1 tsp cinnamon
1 tsp vanilla
1/2 tsp salt
2 large eggs
3 cups old-fashioned or quick-cooking oats
1+1/3 cups flour
1 cup raisins, craisins, chocolate chips, and/or M&M's

1. Heat oven to 350. In a large bowl, stir the brown sugar, butter, baking soda, cinnamon, vanilla, salt, and eggs with a wooden spoon until well mixed. Stir in the oats, flour and mix-in{s}.

2. Using a cookie scoop, or tableware spoon, place rounded tablespoonfuls of dough onto an ungreased cookie sheet, 2 inches apart.

3. Bake 9-11 minutes or until light brown. Remove cookies from the sheets onto cooling racks. Continue with the rest of the dough.

4. Share with your neighbour and Enjoy! :)


Thursday, March 27, 2014

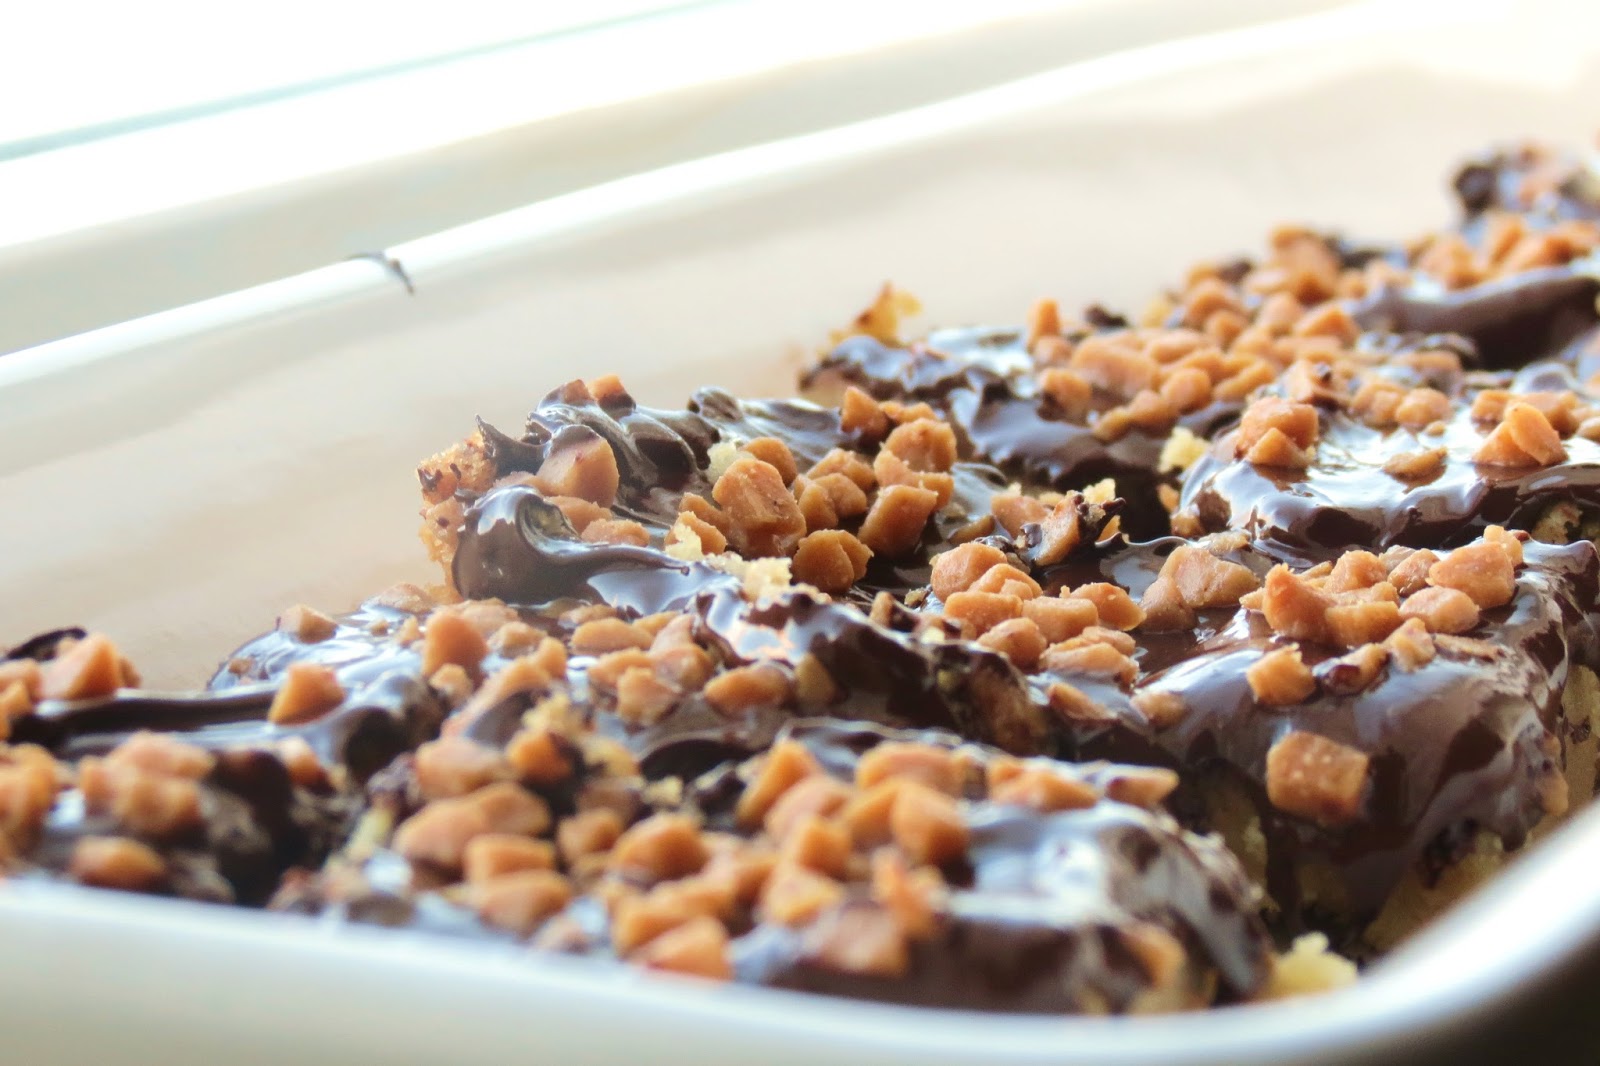
Thursday Treats: Toffee Bars {Betty Crocker}

I was looking for something both simple and quick because I didn't have very much time before our Thursday night Bible study and Prayer night, and these Toffee Bars fit the bill.


Actually, they might've been too easy because I messed up in the first step. I let my mind wander and put the egg in before separating the yolk and white.


It was ok though, because I quickly found another use for my "mess-up" and started over again on these. I paid attention to the egg part...


...but not to the butter. I was wondering why my mixture was so dry and crumbly and kept going over the list of ingredients. Egg, butter, sugar, vanilla, flour, salt...simple line-up and all there. Oh! But wait...I needed two sticks of butter, and I...I only put in one.


Ooops! Good thing I'm pretty ;)


Anyway, there wasn't very much else I could mess up on and if this recipe turned out a fail...it would be no fault of Betty but my own.


They were a success. Soft, shortbread type of crust with enough chocolate  to make it good but not sickeningly sweet. I subbed out the milk chocolate chips {I used those in my rescued mess-up!} for semi-sweet. I also added toffee bits to the top instead of nuts. Whether you make them with my substitutions, or as the original, I'm sure you'll love these treats.


Toffee Bars
Betty Crocker, Baking Basics

1 large egg, separated
1 cup butter, room temperature {2 sticks :)}
1 cup packed brown sugar
1 tsp vanilla
2 cups flour
1/4 tsp salt
2/3 cup milk or semi-sweet chocolate chips
1/2 cup chopped nuts or toffee bits

1. Heat the oven to 350.

2. In a large bowl, place egg yolk, butter, brown sugar and vanilla and stir with a wooden spoon until well mixed.

3. Stir in the flour and salt until mixed. Using your fingers, press the dough firmly and evenly on the bottom of an ungreased 13x9 pan.

4. Bake 25 to 30 minutes or until very light brown {the crust will be soft}.

5. Immediately sprinkle the chocolate chips over the hot crust. Let stand about 5 minutes or until chocolate has softented; spread chocolate evenly over bars, using a metal spatula. sprinkle with the nuts and/or toffee bits.

6. Place pan on cooling rack. Let stand 30 minutes before cutting.

7. Share and enjoy!


There are no calories in these bars because you burn them off mixing the dough by hand.

Therefore, go. Make and eat :)


Thursday, March 20, 2014

Thursday Treats {Pinterest}: Carmelitas

I had wanted to make these last Thursday, but didn't get around to it until the weekend. I made these for our church potluck on Sunday.


And, because Ema Boo reminded me of this pin that I've had on my board for a long time!


The recipe comes from Melissa over at Lulu the Baker. She writes a funny post of entering these into a contest expecting to win but losing to white chocolate & cranberries oatmeal cookies.


If I had been a judge, I would've picked these as winner. More so because I'm not fan of white chocolate OR dried cranberries, than being totally in love with these bars.


These bars were...good, but not my favourite. I loved that they were simple to make with ingredients I had on hand. These are quite rich and one small piece is quite enough. I did add salt to my cream/caramel mixture and that helped cut back on the sweetness.


I think the biggest thing for me was that it was almost too sweet to actually enjoy it. I think if I make this again, I'll probably use dark chocolate and add a bit more salt to the caramel layer. Or, as one of my friends suggested, use apple pieces instead of the chocolate.


Overall, it's a good recipe and one that I would make again. It IS delicious when eaten in small quantities though, so I don't think I'd double the recipe again.

Caramelitas
Melissa @ Lulu the Baker
Pinterest

32 caramel squares, unwrapped
1/2 cup cream
3/4 cup butter, melted
3/4 cup packed brown sugar
1 cup flour
1 cup rolled oats
1 tsp baking soda
6 oz semisweet chocolate chips

1. Combine caramels and cream in a small saucepan, stirring over low heat until smooth. Set aside.

2. In a bowl, combine the butter, sugar, flour, oats, and baking soda.

3. Pat half of the mixture into an 8x8 pan; bake at 350 for 10 minutes.

4. Remove pan from the oven and sprinkle the chocolate chips over the crust and then pour the caramel mixture on top.

5. Crumble the remaining oatmeal mixture on top of the caramel and return the pan into the oven for 15-20 minutes or until the edge is lightly browned.

6. Remove from the oven and let the bars completely cool before cutting into squares.

7. Enjoy with a tall glass of ice cold delicious {chocolate} milk while reading the original post here :)


Thursday, February 13, 2014

Thursday Treats: Boiled Chocolate Cookies {Company's Coming} + No-Bake [Nutella] Cookies {Me}


For some reason, I had my heart set on making No-Bakes this week. The first time I had made them was for college lunch and I remember having tray full stacked on the racks. Making treats was one of my favourite things to do in the kitchen.


I searched in at least 10 of my cookbooks for this classic treat, when finally I came across this one in one of my Company's Coming books. I'll admit, I was ready to just use a recipe online! The only thing is, my memory is either getting really bad, or the recipe at college is one-of-a-kind; the recipe doesn't jive with what's in my head :P

I definitely remember putting PB in the mixture though, so I put some Nutella in mine--I'm out of PB.

The cookies are very moist with a hint of Nutella. I love the flavour of the oats, and since I didn't put very much sugar, these cookies have a dark chocolate taste to them.

Excellent for Valentine's Day...you can indulge without getting sick of chocolate {although, I don't who would! :P}


Boiled Chocolate Cookies
Tempting Treats & Cookies
Company's Coming

2 cups sugar
1/2 cup butter
1/2 cup milk
1/2 cup cocoa
2+1/2 cups quick-cooking rolled oats {not instant}

1. Combine first 4 ingredients in medium saucepan. Bring to a boil on medium heat. Reduce heat to medium-low. Simmer, uncovered, for 5 minutes, stirring occasionally. Remove from heat.

2. Add rolled oats. Mix well. Let stand for 15 minutes. Drop, using 1 tbsp for each, onto waxed paper-lined cookie sheets. Chill for about 1 hour until firm.


My Version

1/2 cups sugar
1 cup butter
1 cup milk
1/2 cup cocoa
1 cup Nutella
3 cups quick-cooking rolled oats {not instant}

1. Combine first 5 ingredients in medium saucepan. Bring to a boil on medium heat. Reduce heat to medium-low. Simmer, uncovered, for 5 minutes, stirring occasionally. Remove from heat.

2. Add rolled oats. Mix well. Drop, using 1 tbsp for each, onto waxed paper-lined cookie sheets. Chill for about 1 hour until firm, or let stand at room temperature till set.


Enjoy!

Thursday, February 6, 2014

Thursday Treats: Chewy Chocolate Chip Cookies {America's Test Kitchen: Family Cookbook}

This is my absolute, favourite chocolate chip cookie recipe. I've tried many, and although I'm up to making ones that are bragged on...I will always run back to this recipe. They are perfect. 


Chewy Chocolate Chip Cookies
America's Test Kitchen: Family Cookbook

3+1/3 cups flour
3/4 tsp baking soda
1/2 tsp salt
16 tblsp {2 sticks} unsalted butter, melted and cooled
1+1/4 cup packed light brown sugar
1/2 cup sugar
2 large eggs
2 large egg yolks
1 tblsp vanilla
2 cups chocolate chips {12 oz bag}

1. Heat the oven to 325. Whisk flour, baking soda, and salt together in a bowl.

2. Beat the butter and sugars on medium speed until combined, 1-2 minutes. Beat in the eggs, egg yolks, and vanilla, until combined.

3. Reduce mixer speed to low and mix in the flour mixture until combined. Mix in the chocolate chips until incorporated.

4. Using a small cookie scoop, form dough and place on baking sheets. Bake 8-10 minutes {rotate sheet halfway through baking time}, or until the edges are golden brown. Let cool on baking sheets for 1 minute and then transfer to wire cooling racks.

5. Enjoy!!


Thursday, January 30, 2014

Thursday Treats: Good Housekeeping's Fudgy Brownies {Good Housekeeping}


I love brownies because they are so easy.


You don't need multiple bowls or fancy gadgets.


All you need for these brownies is 2 {small} bowls, a wooden spoon, whisk, and a saucepan.


Unless you're me and you don't use a big enough saucepan...than you will need another {big} bowl :D

Oh, and if you use the normal 8"x8" pan...you will have to double your baking time.

Just in case you guys don't read this recipe right.

I really hope I'm not the only one who does that!!


The brownie is not too sweet--you use unsweetened and dark chocolate--so its a perfect base to jumpstart your creativity.


It is delicious on its own...


topped with mini chocolate chips...


sweetened coconut {this is for my Pastor's wife--she loves coconut. Me? Not so much!}...


or M&M's :D


Oh, and underneath the toppings? Fudgy chocolate frosting!

And, it all works because the brownie isn't sweet, but has a rich chocolate flavour that is quite delicious on its own, or topped by frosting and goodies!

Good Housekeeping's Fudgy Brownies
Good Housekeeping

1+1/4 cups flour
1/2 tsp salt
1+1/2 sticks {3/4 cup} butter
4 squares {4 oz} unsweetened chocolate, chopped
4 squares {4 oz} semisweet chocolate, chopped
2 cups sugar
1 tblsp vanilla
5 large eggs, beaten

1. Preheat oven to 350F. Line a 13"x9" baking pan with foil; grease. In a small bowl, blend flour and salt.

2. In a heavy 4-quart saucepan, melt butter and chocolates over low heat, stirring frequently until smooth. Remove from heat and stir in sugar and vanilla. Add eggs; stir until well mixed. Stir flour mixture into chocolate mixture just until blended. Spread batter evenly into your prepared pan.

3. Bake until toothpick inserted 1 inch from the edge comes out clean, about 30 minutes. Cool completely in pan on wire rack.

4. When cool, lift foil, with brownie, out of the pan; peel foil away from the sides.

Cut and serve. Enjoy!!


Thursday, January 23, 2014

Thursday Treats: Drop Sugar Cookies {Good Housekeeping}


I was quite skeptical that these cookies would turn out. They just seemed...too easy.

Just flour, baking powder, salt, butter, sugar, an egg and vanilla. Simple ingredients. No chilling. No cutting out.

And, they're soft and chewy.


These cookies taught me two things. I need glasses and the need to correctly read recipes :D

I only needed 1+1/3 cups of flour, but I thought I was supposed to put in 1+3/4 cups. I was so confused when my dough didn't form, but separated into thousands of dry little balls. After I figured out I had put way too much flour in, I threw an extra egg and 1/4 cup of butter in to even things out.

Whew. An easy, but unnecessary fix if I was but paying attention :P

Drop Sugar Cookies
by Good Housekeeping

1+1/3 cups flour
3/4 teaspoon baking powder
1/4 teaspoon salt
1/2 cup butter
1 cup sugar
1 large egg
1 teaspoon vanilla
M&M's and chocolate chips: optional mix-in

1. Preheat oven to 350F. In a small bowl, combine the flour, baking powder, and salt.

2. In a large bowl, beat butter and sugar until light and fluffy--your mixer should be on medium speed. Beat in the egg next as well as the vanilla. Reduce the speed of your mixer and add the flour mixture just until combined.

3. Drop dough by heaping teaspoons {I use a small ice cream/cookie scoop} 2 inches apart on ungreased cookie sheets. Bake until edges are brown--10 minutes or so--and make sure to rotate your pan at the half-way mark. {Unless you have a convection oven, in which case you can disregard the rotating instruction.}

4. Transfer cookies to wire racks to cool completely. Repeat with remaining dough.

5. You can store cookies in a cookie jar for 1 week or freeze up to 3 months.


So, since I'm not a huge fan of plain cookies {ie, sugar or shortbread cookies} I threw in a handful of M&M's and milk chocolate chips into the dough after I made 1 plain batch.

Both taste really good...but, the ones with the mix-ins are the bomb. I've been really, really, really wanting some M&M cookies, and these totally fit my craving.

Good thing the recipe didn't make a huge batch!


Thursday, January 16, 2014

Thursday Treats: Cake Pops {Bakerella}

A couple in our church got married back in August, and I had the pleasure {with lots of ahhhhhh!!!! moments in which I would psyche myself out, lol} of doing their cake and dessert table {with the help of my dear friends Sarah and T!}

Because I wanted to focus on the dessert table, the cake was more of a traditional look and the customary bride/groom feed each other cake. In that case, only the top of the 3 tiered "cake" was actual cake :D The bottom two were just Styrofoam from Michael's.

One of the many things we had on the dessert table were cake pops! I must say, even though I read the recipes, read all the techniques/trouble-shooting tips, looked at pictures, read reviews...I did not get it perfect the first time...or 10th time :D Until you get into a rhythm, these take work.

Definitely do some a week or two before you need them just to get a feel of how things should go.

Otherwise, these were delicious. My personal favourite would be chocolate cake with chocolate coating :D, but these were pretty good too. The colours were pink and baby blue and we primarily just used those colours as accents to the white and burlap we used for decoration. It turned out very nice!

I was out hopping garage sales when I came across Bakerella's book Cake Pops. That's when I knew I had to include them in the Wedding Dessert Repertoire.

I'm giving you the basic recipe here, but if you go to her website, Angie has a lot more tips, photos, recipes, and inspiration to create your own one-of-a-kind treat. These Minions are SO cute!


{Basic} Cake Pops
Cake Pops by Bakerella

You will need:

18.25 oz box cake mix {chocolate, yellow, white etc.}
9-by-13-inch cake pan
large mixing bowl
16 oz. container ready-made frosting
large metal spoon
wax paper
2 baking sheets
plastic wrap
48 oz {3 pounds} candy coating
deep, microwave-safe plastic bowl
48 paper lollipop sticks

How To:

1. Bake the cake as directed on the box, using a 9 by 13 inch cake pan. Let cool completely.

2. Once the cake is cooled, get organized and set aside plenty of time {a couple hours} to crumble, roll, and dip 4 dozen cake pops.

3. Crumble the cooled cake into a large mixing bowl. you shouldn't see any large pieces of cake.

4. Add 3/4 of the container of frosting {you don't need the rest} and mix it into the crumbled cake using the back of the metal spoon, until thoroughly combined.

*If you use the entire container of frosting, the cake will be too moist and you will pull your hair out trying to get these to work.*

5. The mixture should be moist enough to roll into 1+1/2 inch balls and still hold a round shape. After rolling the cake balls by hand, place them on wax paper-covered baking sheets.

6. Cover with plastic wrap and chill for several hours in the fridge or in the freezer for about 15 minutes. You want the balls to be firm--don't freeze.

*Oh, by the way...make sure you have room in your fridge prior to making these :)*

7. Place the candy coating in a deep, microwave-safe plastic bowl. Melt the candy coating following package instructions. Don't overheat!

It's dipping time!

8. Take a few cake balls at a time out of the fridge/freezer to work with. If you had'em in the freezer, move them to the fridge at this point so the rest don't freeze.

9. One at a time, dip about 1/2 inch of the tip of a lollipop stick into the melted candy coating, and then insert the stick straight into a cake ball, pushing it no more than halfway through.

10. Holding the lollipop stick with cake ball attached, dip the entire cake ball into the melted candy coating until it is completely covered and remove it in one motion. Sake sure the coating meets at the base of the lollipop stick. This helps secure the cake ball to the stick when the coating sets. The object is to completely cover the cake ball and remove it without submerging it in the coating more than once. A small, deep plastic bowl is helpful during this step.

11. When you remove the cake pop from the candy coating, some excess coating may start to drip. Hold the cake pop in one hand and use the other hand to gently tap the first wrist. Rotate the lollipop stick if necessary to allow the excess coating to fall off evenly, so one side doesn't get heavier than the other.

12. Repeat with the rest of the cake balls

13. Store the cake pops in an airtight container on the counter or in the fridge for several days.

Enjoy and have fun!!


'Member, if you want more details or pictures of the steps, head over to Bakerella's website :).


*PS. I'm doing posts on recipes I've tried {mostly from my cookbooks} and either enjoyed, or hated. I do include websites or links to particular cookbooks, but that is more for clarification and because I totally love them. I've not been asked by anyone for endorsement. Just so we're all clear on that :D
Thanks!*