Pages

Showing posts with label Cookbooks. Show all posts

Thursday, August 28, 2014

Thursday Treats: No-Cook Chocolate Fudge {Betty Crocker}


My friend Deb loves fudge more than any other dessert or sweet. She has a favourite recipe, but doesn't like baking very much--enter Elsa. This was the first time I made fudge, and wanted to test some recipes, so I began with this simple one from Betty Crocker's book. Her fiance really loved the book variation, but Deb swooned when she tried my second batch with my adjustments. Crocker's fudge is pretty good...but it lacked the richness and creamy smoothness of what you expect from fudge [my variations were an improvement, but I'm still on the search for great fudge!]. To me, it tasted like glorified semi-sweet chocolate chips. However, I did like her recipe in that you could eat more than just one tiny square and not get sick :D

I would say that this is a great first-timer's recipe to follow, but to me the taste didn't scream "FUDGE!". You decide!

No-Cook Chocolate Fudge
Betty Crocker Cookbook: 1500 Recipes for the Way You Cook Today
Betty Crocker
[Blue changes my modifications]

1 can [14 oz] sweetened condensed milk
1 bag [12 oz/2 cups] semisweet chocolate chips
[1+1/2 cups milk chocolate chips + 1/2 cup semisweet chocolate chips]
1 oz unsweetened baking chocolate, if desired
[Left out]
1 +1/2 cups chopped nuts, if desired
[Left out b/c Deb doesn't like nuts in her fudge, but would've used toasted pecan pieces.]
1 tsp vanilla

1. Grease bottom and sides of an 8-inch square pan with butter.

2. In a saucepan, heat the condensed milk, chocolate chips, and unsweetened chocolate over low heat, stirring constantly, until chocolate is melted and the mixture is smooth; remove from heat.

3. Quickly stir in the nuts and vanilla. Spread the fudge in the pan. Refrigerate about 1 hour and 30 minutes or until firm. Cut into 1-inch squares. Store in an airtight container.


Wednesday, May 28, 2014

Bonus Treats: Classic Carrot Cake with Cream Cheese Frosting {Flour}

My friend Deb, from work, was lamenting the fact that she couldn't get a birthday carrot cake anywhere in town. Her son is turning 18 this weekend, and that was his choice of cake. Anyway, I offered to make her one and gave cupcake samples this evening.


For this recipe, I turned to my trusted--and treasured!--Flour cookbook by Joanne Chang. Absolutely everything I've made from her book is outstandingly good.


And, this recipe didn't disappoint. I'm not a fan of cooked carrots. And, I cannot stand cooked fruits etc. in my baked goods. BUT, no matter how much you dislike something, if you make it to serve others, you need and must try the dish before allowing others to eat your cooking/baking.


And, they are delicious. Seriously. If there's ever going to be a recipe to win me over to eating carrots in my cake...this one is it. I'll post a picture of the cake on Friday!

Classic Carrot Cake with Cream Cheese Frosting
Flour, Joanne Chang

[I made the frosting first, as it has to be refrigerated for at least 2 hours.]

2 eggs
1 cup light brown sugar, packed
3/4 cup oil
3 tblsps buttermilk
1/2 tsp vanilla extract
1 cup + 2 tblsps flour
1/2 tsp baking powder
1/2 tsp baking soda
1/2 tsp kosher salt
1/2 tsp cinnamon
1/4 tsp ground ginger
2 cups tightly packed shredded carrots
1/2 cup raisins
1/2 cup walnuts, toasted and chopped

Cream Cheese Frosting

12 oz cream cheese, room temperature {leave out for 4 hours prior to using}
1/2 cup unsalted butter, at room temperature
1 + 2/3 cup icing sugar

1. Pre-heat oven to 350. Butter and flour an 8-in cake pan or line a standard 12-cup muffin tin with paper liners.

2. Using a stand mixer fitted with the whip attachment [or a handheld mixer], beat together the eggs adn brown sugar on medium-high speed for 3-4 minutes, or until the mixture is light and thick. [This step will take 8-10 minutes if using a handheld mixer.] In a small bowl or pitcher, whisk together the oil, buttermilk, and vanilla. On low speed, slowly pour the oil mixture into the egg-sugar mixture. This should take about 30 seconds.

3. In a small bowl, sift together the flour, baking powder, baking soda, salt, cinnamon, and ginger. Using a rubber spatula, fold the flour mixture into the egg-sugar mixture. When most of the flour has been incorporated, add the carrots, raisins, and walnuts and continue to fold until the batter is homogeneous. Pour the batter into the prepared cake pan, or divide evenly among the prepared muffin cups.

4. Bake the cake for about 1 hour, or the cupcakes for 20 minutes. As always, keep an eye on your baking and when the tops are golden brown and a toothpick inserted comes out clean, remove from the oven. Let cool completely on a wire rack.

5. To make the frosting: Put the cream cheese in the stand mixer fitted with the paddle attachment, and bet on medium speed for about 1 minute, or until smooth. Add the butter and continue to beat for another 1 minute. Scrape the sides and bottom of the bowl and add the icing sugar. Beat for 1 more minute, or until well mixed. You should have about 3+1/2 cups. Cover and refrigerate for 2-3 hours before using to allow it to firm up enough to pipe and spread.

6. Frost your cake/cupcakes and decorate as you wish.

Enjoy!


Here's the cake. Gotta say, I need more cakes to practice on!


Thursday, April 10, 2014

Thursday Treats: Fluffy Cheesecake {Kraft-Cheesecakes & More}

Whenever I want to make a super yummy and simple dessert, cheesecake never fails. Specifically, one that doesn't have to be baked. Like my Creamy, Dreamy Oreo Dessert. From start to finish, it takes me about 15 minutes to put this dessert together. Even shorter if one uses cool whip instead of whipping cream...which I don't suggest, because it won't taste as good :)


This past Sunday, I made Fluffy cheesecake out of my Kraft book. It's a 3-1 type of thing, with recipes including the Jello brand, Cool Whip, Philadelphia cream cheese, and Baker's chocolate. This recipe I pulled from the cheesecake section. Normally, I make this recipe off the top of my head; I don't use a recipe. However, for the purpose of this post, I decided to {kinda} follow this one!


It is creamy and light with just the right amount of texture with the graham crust. I served mine with cherry pie filling, but you can top your cheesecake with whatever you want :D


Fluffy Cheesecake
Philidelphia Cheesecakes and More
Kraft
{Original recipe as written, but I always double my recipe}

1 pkg (8oz) Philadelphia cream cheese, softened
1/3 cup sugar
1 tub (8oz) Cool Whip topping, thawed {I use 2+1/2 cups whipping cream, whipped}
1 Honey Maid graham pie crust
Topping of choice

*If you only have one mixer, ie a stand or hand-held, you should whip your cream first so that you don't need to wash your bowl, but can just use it for the
cream cheese mixture. Unless you love doing dishes--then, by all means, make as many dirty bowls as you wish :D*

1. With your mixer, whip your cream until stiff peaks form. Set aside.

2. Beat the cream cheese and sugar together until well blended. Gently fold in your whipped cream.

3. Spoon into crust and top with topping of choice. {For fresh fruit, I would wait until just before serving to put it on.}

4. Refrigerate for 3 hours or until set.

5. I always make these into squares, so for this, you omit the pie crust. Mix 1 cup of graham cracker crumbs, 2 tablespoons of sugar, and 1/3 cup of melted butter. Press onto the bottom of and 8 inch square pan. Continue as directed.

6. Enjoy!


Wednesday, April 9, 2014

Bonus Treats: Homemade Pop Tarts {Classic Snacks} + Classy Nautical


I saw this cookbook at the Superstore, and having restricted myself to shop cookbooks with a purpose, I didn't get it the first few times I went grocery shopping.

Every time I would pass by the book aisle [...yes, yes...I didn't have to go down that aisle, but--whatever, I always do :P] I looked and picked it up; tried to find some justification in buying another cookbook--apparently, loving cookbooks doesn't count ;)


Then! I saw a recipe for these babies. You see, I have a dear friend who adores pop tarts, but whose husband doesn't...approve of pop tarts {ya know, 'cause they're bad for you and all. Plus, they taste like cardboard} and I thought this would be perfect for her.


I was supposed to make them several weeks ago for her birthday...but, yeah, I missed that boat. Here's to hoping she'll love them so much, it won't matter if they're a few weeks late :D I took some over to her house last night for us girls to test them out after we helped her pack. Moving and a baby all within 2 weeks? You go, girl :D

I made raspberry, and brown sugar/cinnamon. While I wouldn't call them out of this world good...they are pretty good. I think the more I practice making them, the better they'll be. I used raspberry jam, and I think that had a part in making the tarts a little too sweet. For the brown sugar/cinnamon ones, I need to add more spice. Although, maybe if my crust was rolled out a little more thin, I wouldn't have overfilled the pop tarts and they would've been perfect?


Overall, I'm pretty pleased with how these turned out, but, I have plans for making them taste spectacular :D


Homemade Strawberry Pop Tarts
Classic Snacks Made from Scratch
Casey Barber
*I used raspberry jam filling, but only because I was running out of time. My next try will be true to the recipe :D*

Crust

2+1/2 cups flour
2 tsps sugar
1/2 tsp salt
8 tblsp chilled unsalted butter, cut into 1/2in cubes
1/4 cup ice-cold water
1 tblsp distilled white vinegar
1 large egg whisked with 1 tblsp water, for egg wash

Make the Dough

1. Pulse the flour, sugar, and salt together in the bowl of a food processor to sift and combine.

2. Add the butter and shortening and pulse in 3-second bursts until partially incorporated with pea-sized chunks visible and a texture resembling moist cornmeal.

3. With the processor running, drizzle the water and vinegar through the feed just until a shaggy and crumbly dough starts to form. Transfer to a bowl; divide the dough in half and shape into 2 discs. Wrap plastic wrap and refrigerate for at least 1 hour {or overnight}

Strawberry Filling

1 lb. strawberries, hulled
3/4 cup sugar
1 tblsp lemon juice

1. While the dough chills, cut the strawberries in halves or quarters, depending on size, and mash roughly with a potato masher in a large bowl. Keep a bunch of big chunks in there; they'll break down in the jam, but it'll be more interesting that way.

2. Stir in the sugar and lemon juice and let sit at room temperature for 30 minutes to break down the berries slightly. Stir once or twice while the berries sit to dissolve the sugar.

3. Pour the strawberries and their liquid into a high-sided pan or Dutch oven. Bring to a low boil over medium heat. Once the berries come to a boil, remove the strawberry chunks with a slotted spoon or flat mesh strainer and reserve in a medium bowl. Continue to let the syrup boil, stirring often, until thickened and jelly-like, about 15-20 minutes.

4. Return the strawberry chunks to the pan and cook for 5-10 minutes more, until the jam is the desired thickness and consistency. Transfer to a clean bowl or Mason jar.

Assemble + Bake

1. Preheat the oven to 375F. Line 2 rimmed baking sheets with parchment paper or Silpat liners.

2. On a floured surface, roll one of the dough discs to a 10x12in rectangle about 1/4in thick.

3. Use a pastry or pizza cutter to divide into 6 {3x5in} rectangles; place on the prepared baking sheets. Repeat with the second disk, but leave those 6 on your work surface.

4. Spoon 2-3 tablespoons of filling into the center of each rectangle on the baking sheets. Brush the edges with the egg wash.

5. Place a reserved dough rectangle atop each filled rectangle and seal the edges by pressing with the tines of a fork. Use the fork to poke vent holes in the pastry tops.

6. Bake for about 30 minutes or until golden brown and puffed. Transfer the tarts to a wire rack and let cool completely before eating or frosting.

Frosting

1+1/2 cups powdered sugar
2-3 tblsps milk
1 tsp vanilla

1. Whisk the powdered sugar, 2 tablespoons of milk, and vanilla together to form a thick glaze. Add the final tablespoon of milk a drizzle at a time until the glaze has the consistency you want.

2. Use a basting brush to spread the glaze on the cooled pastries.


Enjoy your homemade pop tarts!!


*************************************************


My friend Sarah is still in the contest! She won last weeks theme, with her Springtime in Paris look--thanks for voting for her!!

This week, it was all about designing your own fabric. Just look at the adorably simple dress her daughter has on. And, suspenders on her little guy? Cute!!

I love how her nautical theme is classy and yet fun. Head over to her blog to see many more shots of her outfits and sweet kiddos.

And, don't forget to cast your vote for your favourite look! Voting is open through Thursday night at 8 :)

Click HERE.

Thanks so much, guys and enjoy those Pop Tarts while perusing Sarah's blog :D

Have a great evening!


Thursday, March 27, 2014

Thursday Treats: Toffee Bars {Betty Crocker}

I was looking for something both simple and quick because I didn't have very much time before our Thursday night Bible study and Prayer night, and these Toffee Bars fit the bill.


Actually, they might've been too easy because I messed up in the first step. I let my mind wander and put the egg in before separating the yolk and white.


It was ok though, because I quickly found another use for my "mess-up" and started over again on these. I paid attention to the egg part...


...but not to the butter. I was wondering why my mixture was so dry and crumbly and kept going over the list of ingredients. Egg, butter, sugar, vanilla, flour, salt...simple line-up and all there. Oh! But wait...I needed two sticks of butter, and I...I only put in one.


Ooops! Good thing I'm pretty ;)


Anyway, there wasn't very much else I could mess up on and if this recipe turned out a fail...it would be no fault of Betty but my own.


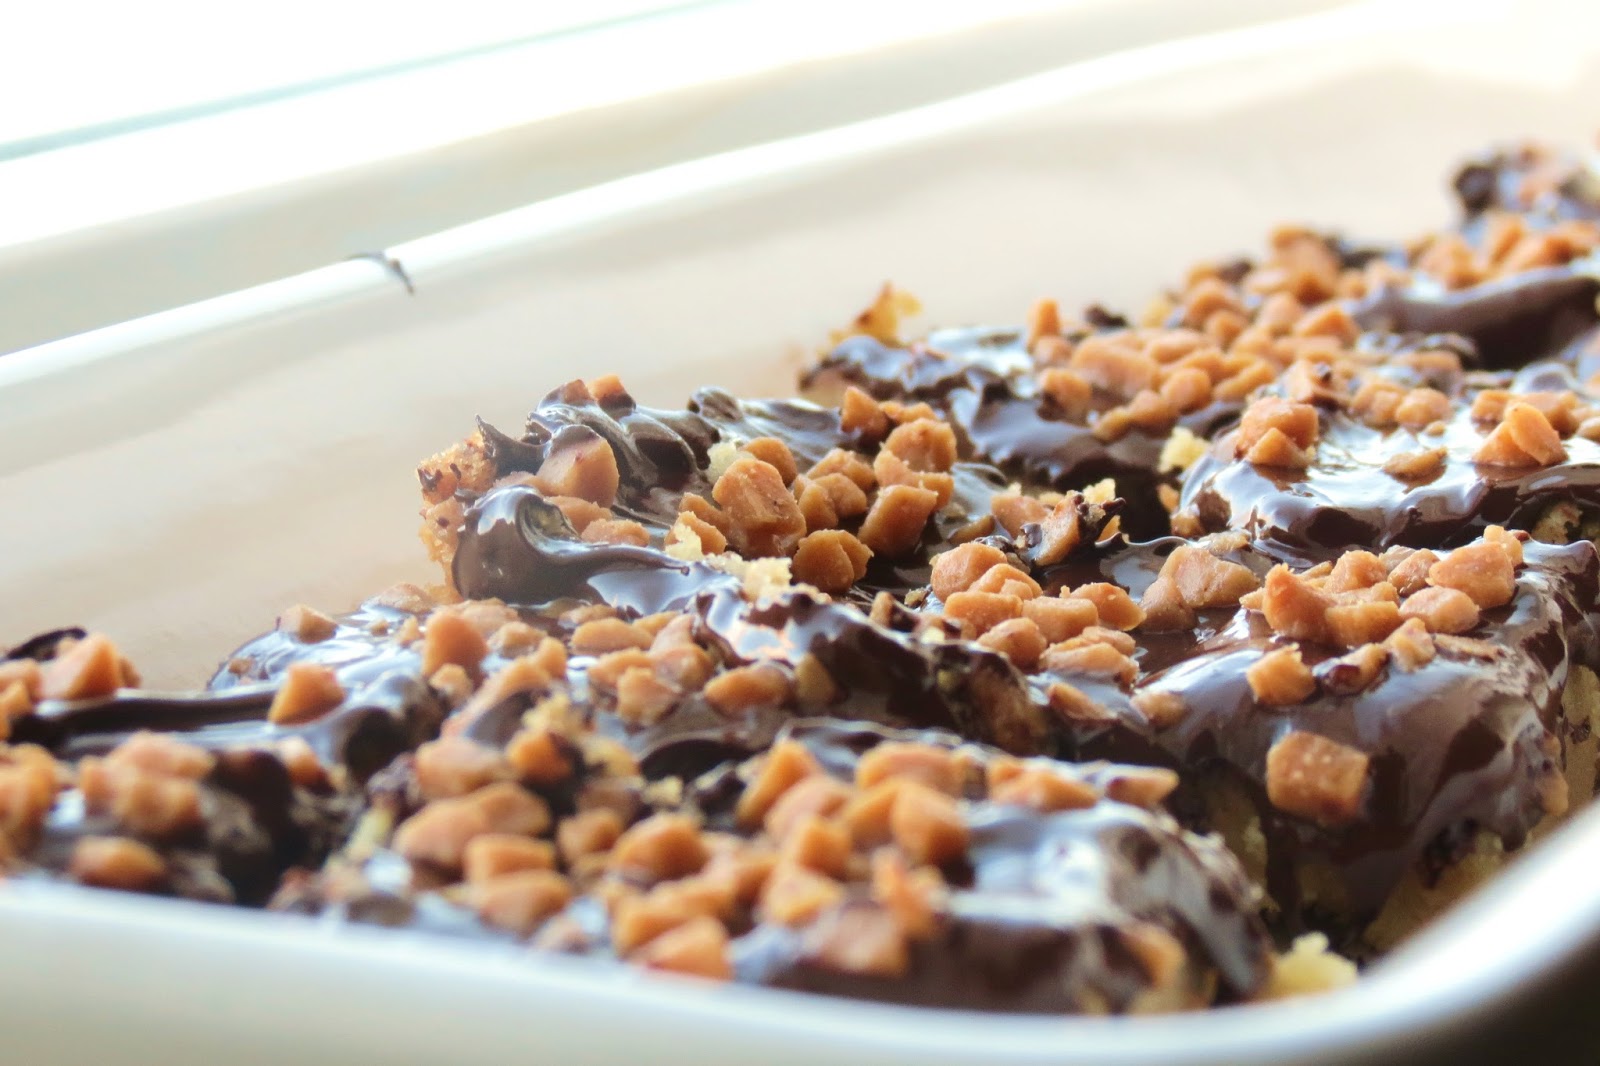
They were a success. Soft, shortbread type of crust with enough chocolate  to make it good but not sickeningly sweet. I subbed out the milk chocolate chips {I used those in my rescued mess-up!} for semi-sweet. I also added toffee bits to the top instead of nuts. Whether you make them with my substitutions, or as the original, I'm sure you'll love these treats.


Toffee Bars
Betty Crocker, Baking Basics

1 large egg, separated
1 cup butter, room temperature {2 sticks :)}
1 cup packed brown sugar
1 tsp vanilla
2 cups flour
1/4 tsp salt
2/3 cup milk or semi-sweet chocolate chips
1/2 cup chopped nuts or toffee bits

1. Heat the oven to 350.

2. In a large bowl, place egg yolk, butter, brown sugar and vanilla and stir with a wooden spoon until well mixed.

3. Stir in the flour and salt until mixed. Using your fingers, press the dough firmly and evenly on the bottom of an ungreased 13x9 pan.

4. Bake 25 to 30 minutes or until very light brown {the crust will be soft}.

5. Immediately sprinkle the chocolate chips over the hot crust. Let stand about 5 minutes or until chocolate has softented; spread chocolate evenly over bars, using a metal spatula. sprinkle with the nuts and/or toffee bits.

6. Place pan on cooling rack. Let stand 30 minutes before cutting.

7. Share and enjoy!


There are no calories in these bars because you burn them off mixing the dough by hand.

Therefore, go. Make and eat :)


Thursday, March 6, 2014

Thursday Treats: Pumpkin Bars {Better Homes and Gardens Magazine}

Alright, technically, this recipe isn't from one of my cookbooks, but a special publication of BH&G indulging in the world of brownies and bars. For me, it counts because there are but 1 or 2 ads and the rest is recipe love--120 of'em.


Anyway, these are SO simple to make and absolutely delicious {with my modifications}. I made a batch on Tuesday night to take for dessert at a supper with friends, and although good--it was a little bit bland tasting. So when I made a batch this afternoon to take to church {and gift some :}, I upped the salt and cloves.

That's all it took to take this recipe to great to out-of-this-world. They are very soft and moist and have the perfect blend of spices.


And the browned butter frosting? Mmm, YUM!

In my opinion--as good as the frosting tastes--I prefer these in their un-adorned perfection :D


Pumpkin Bars
Better Homes and Gardens Special Interest Publications: Brownies & Bars

2 cups flour
1+1/2 cups sugar
2 tsp baking powder
1 tsp baking soda
1 tsp salt
2 tsp cinnamon
1 tsp ground cloves
1-15 oz can pumpkin
4 eggs
1 cup vegetable oil
Browned Butter Frosting

1. Pre-heat oven to 350F. In a large bowl, whisk together flour, sugar, baking powder, baking soda, salt, cinnamon, and cloves.

2. In a smaller bowl, lightly beat the eggs, pumpkin, and oil. Stir into the dry ingredients to combine. Spread batter evenly in an ungreased 15x10x1-in pan.

3. Bake for 25 minutes or until toothpick inserted in the center comes out clean. Cool in pan on a wire rack.

4. Spread with Browned Butter Frosting. Cut into bars. Enjoy!

Browned Butter Frosting

In a small saucepan, heat 1/3 cup of butter over low heat until melted. Continue heating until butter turns a golden brown. Remove from heat. In your mixing bowl attached with whisk attachment, combine 3 cups of powdered sugar, 2 tablespoons milk, and 1 teaspoon vanilla. Add the browned butter and beat on low speed until combined. Beat, on medium to high speed, until spreading consistency. Add more milk as needed.

Thursday, February 20, 2014

Thursday Treats: Light-as-Air Glazed Donuts {150 Best Donut Recipes}

Mmmm, Donuts. I don't eat donuts very often, but I know which ones I like.

These ones, I like :D


The recipe is pretty straight-forward and quite simple to make. As always, be sure to read the recipe through and have your ingredients prepped.

Mine were not quite "light-as-air" as I'd hoped, but it could've been my own fault. I will definitely make these again and also try out the other 149 recipes :D


Light-as-Air Glazed Donuts
150 Best Donut Recipes, Fried or Baked
George Geary

1 cup + 1Tblsp whole milk, warmed to 110F {43C}
2 pkgs {1/4oz//8g} quicke-rising {instant} yeast
3 egg whites
3 Tblsp oil
2 tsp vanilla
3 cups all-purpose flour, divided {approx}
3/4 cup rice flour
1+1/2 Tblsp sugar
1 tsp salt
oil for frying
2 cups icing sugar + water for glaze

1. In mixer bowl, sprinkle yeast over milk and stir with a fork. Let stand until foamy, about 5 minutes.

2. Attach bowl to mixer fitted with paddle attachment and add egg whites, oil, vanilla, 1 cup of flour, rice flour, sugar and salt to the yeast mixture. Let stand in bowl for 10 minutes. On low speed, mix just until blended, then gradually add just enough of the remaining flour until the dough starts to pull away from the sides of bowl. Increase speed to medium and beat for 1 minute.

3. Transfer dough to a large oiled bowl and cover with plastic wrap. Let rise in warm, draft-free place until doubled in volume, about 30 minutes.

4. On a floured work surface, roll out dough to slightly thicker than 1/4 inch. If dough is tacky, dust with additional flour. Cut dough with cutter into 18 doughnuts, re-rolling scraps as necessary. Place at least 1 inch apart on parchment lined baking sheets. Cover with a clean kitchen towel and let rise for 20 minutes.

5. Meanwhile, in a large, deep pot or deep fryer, heat about 4 inches of oil over medium heat until the temperature  registers 360F. Deep-fry 3-4 donuts at a time in hot oil turning once with wooden chopsticks, until golden brown, about 15 seconds per side. Using a slotted metal spatula, transfer to paper towels to absorb excess oil. Fry remaining donuts, adjusting heat as necessary between batches to maintain oil temperature.

6. Make your glaze by adding enough water to the icing sugar to create a thin consistency. Glaze donuts while still warm, and place on rack to cool.


Thursday, February 13, 2014

Thursday Treats: Boiled Chocolate Cookies {Company's Coming} + No-Bake [Nutella] Cookies {Me}


For some reason, I had my heart set on making No-Bakes this week. The first time I had made them was for college lunch and I remember having tray full stacked on the racks. Making treats was one of my favourite things to do in the kitchen.


I searched in at least 10 of my cookbooks for this classic treat, when finally I came across this one in one of my Company's Coming books. I'll admit, I was ready to just use a recipe online! The only thing is, my memory is either getting really bad, or the recipe at college is one-of-a-kind; the recipe doesn't jive with what's in my head :P

I definitely remember putting PB in the mixture though, so I put some Nutella in mine--I'm out of PB.

The cookies are very moist with a hint of Nutella. I love the flavour of the oats, and since I didn't put very much sugar, these cookies have a dark chocolate taste to them.

Excellent for Valentine's Day...you can indulge without getting sick of chocolate {although, I don't who would! :P}


Boiled Chocolate Cookies
Tempting Treats & Cookies
Company's Coming

2 cups sugar
1/2 cup butter
1/2 cup milk
1/2 cup cocoa
2+1/2 cups quick-cooking rolled oats {not instant}

1. Combine first 4 ingredients in medium saucepan. Bring to a boil on medium heat. Reduce heat to medium-low. Simmer, uncovered, for 5 minutes, stirring occasionally. Remove from heat.

2. Add rolled oats. Mix well. Let stand for 15 minutes. Drop, using 1 tbsp for each, onto waxed paper-lined cookie sheets. Chill for about 1 hour until firm.


My Version

1/2 cups sugar
1 cup butter
1 cup milk
1/2 cup cocoa
1 cup Nutella
3 cups quick-cooking rolled oats {not instant}

1. Combine first 5 ingredients in medium saucepan. Bring to a boil on medium heat. Reduce heat to medium-low. Simmer, uncovered, for 5 minutes, stirring occasionally. Remove from heat.

2. Add rolled oats. Mix well. Drop, using 1 tbsp for each, onto waxed paper-lined cookie sheets. Chill for about 1 hour until firm, or let stand at room temperature till set.


Enjoy!

Thursday, February 6, 2014

Thursday Treats: Chewy Chocolate Chip Cookies {America's Test Kitchen: Family Cookbook}

This is my absolute, favourite chocolate chip cookie recipe. I've tried many, and although I'm up to making ones that are bragged on...I will always run back to this recipe. They are perfect. 


Chewy Chocolate Chip Cookies
America's Test Kitchen: Family Cookbook

3+1/3 cups flour
3/4 tsp baking soda
1/2 tsp salt
16 tblsp {2 sticks} unsalted butter, melted and cooled
1+1/4 cup packed light brown sugar
1/2 cup sugar
2 large eggs
2 large egg yolks
1 tblsp vanilla
2 cups chocolate chips {12 oz bag}

1. Heat the oven to 325. Whisk flour, baking soda, and salt together in a bowl.

2. Beat the butter and sugars on medium speed until combined, 1-2 minutes. Beat in the eggs, egg yolks, and vanilla, until combined.

3. Reduce mixer speed to low and mix in the flour mixture until combined. Mix in the chocolate chips until incorporated.

4. Using a small cookie scoop, form dough and place on baking sheets. Bake 8-10 minutes {rotate sheet halfway through baking time}, or until the edges are golden brown. Let cool on baking sheets for 1 minute and then transfer to wire cooling racks.

5. Enjoy!!


Thursday, January 30, 2014

Thursday Treats: Good Housekeeping's Fudgy Brownies {Good Housekeeping}


I love brownies because they are so easy.


You don't need multiple bowls or fancy gadgets.


All you need for these brownies is 2 {small} bowls, a wooden spoon, whisk, and a saucepan.


Unless you're me and you don't use a big enough saucepan...than you will need another {big} bowl :D

Oh, and if you use the normal 8"x8" pan...you will have to double your baking time.

Just in case you guys don't read this recipe right.

I really hope I'm not the only one who does that!!


The brownie is not too sweet--you use unsweetened and dark chocolate--so its a perfect base to jumpstart your creativity.


It is delicious on its own...


topped with mini chocolate chips...


sweetened coconut {this is for my Pastor's wife--she loves coconut. Me? Not so much!}...


or M&M's :D


Oh, and underneath the toppings? Fudgy chocolate frosting!

And, it all works because the brownie isn't sweet, but has a rich chocolate flavour that is quite delicious on its own, or topped by frosting and goodies!

Good Housekeeping's Fudgy Brownies
Good Housekeeping

1+1/4 cups flour
1/2 tsp salt
1+1/2 sticks {3/4 cup} butter
4 squares {4 oz} unsweetened chocolate, chopped
4 squares {4 oz} semisweet chocolate, chopped
2 cups sugar
1 tblsp vanilla
5 large eggs, beaten

1. Preheat oven to 350F. Line a 13"x9" baking pan with foil; grease. In a small bowl, blend flour and salt.

2. In a heavy 4-quart saucepan, melt butter and chocolates over low heat, stirring frequently until smooth. Remove from heat and stir in sugar and vanilla. Add eggs; stir until well mixed. Stir flour mixture into chocolate mixture just until blended. Spread batter evenly into your prepared pan.

3. Bake until toothpick inserted 1 inch from the edge comes out clean, about 30 minutes. Cool completely in pan on wire rack.

4. When cool, lift foil, with brownie, out of the pan; peel foil away from the sides.

Cut and serve. Enjoy!!