Pages

Showing posts with label Cooking. Show all posts

Thursday, March 27, 2014

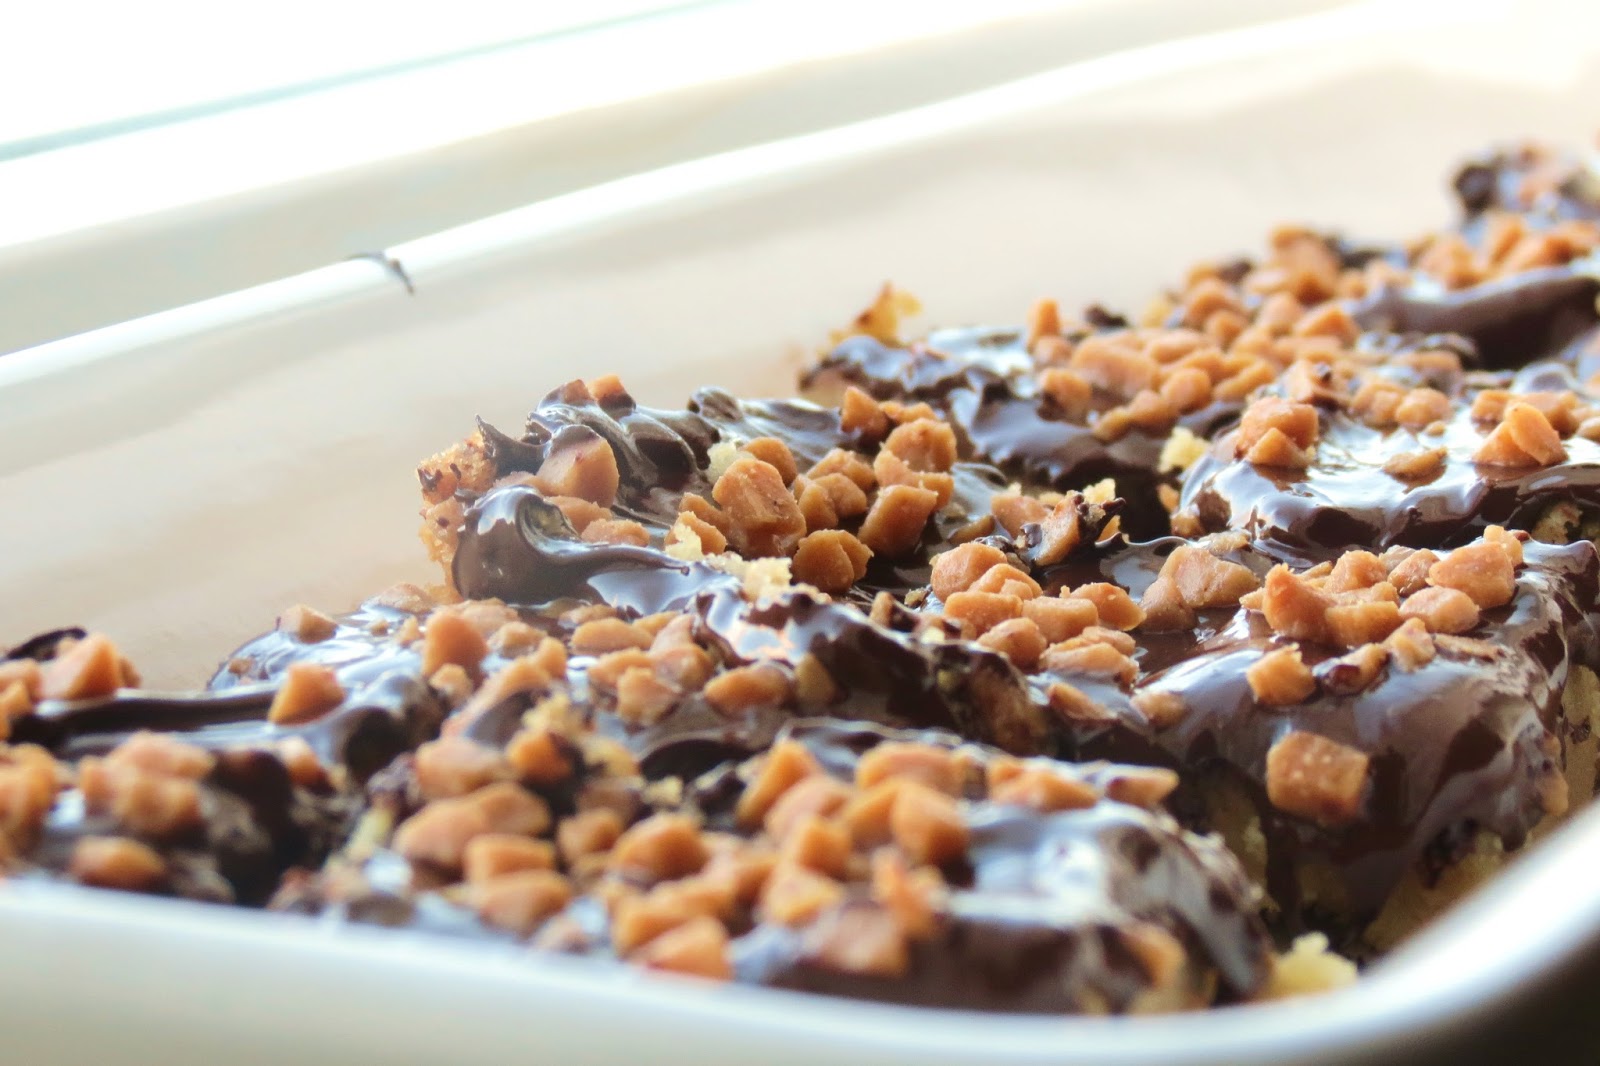
Thursday Treats: Toffee Bars {Betty Crocker}

I was looking for something both simple and quick because I didn't have very much time before our Thursday night Bible study and Prayer night, and these Toffee Bars fit the bill.


Actually, they might've been too easy because I messed up in the first step. I let my mind wander and put the egg in before separating the yolk and white.


It was ok though, because I quickly found another use for my "mess-up" and started over again on these. I paid attention to the egg part...


...but not to the butter. I was wondering why my mixture was so dry and crumbly and kept going over the list of ingredients. Egg, butter, sugar, vanilla, flour, salt...simple line-up and all there. Oh! But wait...I needed two sticks of butter, and I...I only put in one.


Ooops! Good thing I'm pretty ;)


Anyway, there wasn't very much else I could mess up on and if this recipe turned out a fail...it would be no fault of Betty but my own.


They were a success. Soft, shortbread type of crust with enough chocolate  to make it good but not sickeningly sweet. I subbed out the milk chocolate chips {I used those in my rescued mess-up!} for semi-sweet. I also added toffee bits to the top instead of nuts. Whether you make them with my substitutions, or as the original, I'm sure you'll love these treats.


Toffee Bars
Betty Crocker, Baking Basics

1 large egg, separated
1 cup butter, room temperature {2 sticks :)}
1 cup packed brown sugar
1 tsp vanilla
2 cups flour
1/4 tsp salt
2/3 cup milk or semi-sweet chocolate chips
1/2 cup chopped nuts or toffee bits

1. Heat the oven to 350.

2. In a large bowl, place egg yolk, butter, brown sugar and vanilla and stir with a wooden spoon until well mixed.

3. Stir in the flour and salt until mixed. Using your fingers, press the dough firmly and evenly on the bottom of an ungreased 13x9 pan.

4. Bake 25 to 30 minutes or until very light brown {the crust will be soft}.

5. Immediately sprinkle the chocolate chips over the hot crust. Let stand about 5 minutes or until chocolate has softented; spread chocolate evenly over bars, using a metal spatula. sprinkle with the nuts and/or toffee bits.

6. Place pan on cooling rack. Let stand 30 minutes before cutting.

7. Share and enjoy!


There are no calories in these bars because you burn them off mixing the dough by hand.

Therefore, go. Make and eat :)


Thursday, January 23, 2014

Thursday Treats: Drop Sugar Cookies {Good Housekeeping}


I was quite skeptical that these cookies would turn out. They just seemed...too easy.

Just flour, baking powder, salt, butter, sugar, an egg and vanilla. Simple ingredients. No chilling. No cutting out.

And, they're soft and chewy.


These cookies taught me two things. I need glasses and the need to correctly read recipes :D

I only needed 1+1/3 cups of flour, but I thought I was supposed to put in 1+3/4 cups. I was so confused when my dough didn't form, but separated into thousands of dry little balls. After I figured out I had put way too much flour in, I threw an extra egg and 1/4 cup of butter in to even things out.

Whew. An easy, but unnecessary fix if I was but paying attention :P

Drop Sugar Cookies
by Good Housekeeping

1+1/3 cups flour
3/4 teaspoon baking powder
1/4 teaspoon salt
1/2 cup butter
1 cup sugar
1 large egg
1 teaspoon vanilla
M&M's and chocolate chips: optional mix-in

1. Preheat oven to 350F. In a small bowl, combine the flour, baking powder, and salt.

2. In a large bowl, beat butter and sugar until light and fluffy--your mixer should be on medium speed. Beat in the egg next as well as the vanilla. Reduce the speed of your mixer and add the flour mixture just until combined.

3. Drop dough by heaping teaspoons {I use a small ice cream/cookie scoop} 2 inches apart on ungreased cookie sheets. Bake until edges are brown--10 minutes or so--and make sure to rotate your pan at the half-way mark. {Unless you have a convection oven, in which case you can disregard the rotating instruction.}

4. Transfer cookies to wire racks to cool completely. Repeat with remaining dough.

5. You can store cookies in a cookie jar for 1 week or freeze up to 3 months.


So, since I'm not a huge fan of plain cookies {ie, sugar or shortbread cookies} I threw in a handful of M&M's and milk chocolate chips into the dough after I made 1 plain batch.

Both taste really good...but, the ones with the mix-ins are the bomb. I've been really, really, really wanting some M&M cookies, and these totally fit my craving.

Good thing the recipe didn't make a huge batch!


Thursday, January 16, 2014

Thursday Treats: Cake Pops {Bakerella}

A couple in our church got married back in August, and I had the pleasure {with lots of ahhhhhh!!!! moments in which I would psyche myself out, lol} of doing their cake and dessert table {with the help of my dear friends Sarah and T!}

Because I wanted to focus on the dessert table, the cake was more of a traditional look and the customary bride/groom feed each other cake. In that case, only the top of the 3 tiered "cake" was actual cake :D The bottom two were just Styrofoam from Michael's.

One of the many things we had on the dessert table were cake pops! I must say, even though I read the recipes, read all the techniques/trouble-shooting tips, looked at pictures, read reviews...I did not get it perfect the first time...or 10th time :D Until you get into a rhythm, these take work.

Definitely do some a week or two before you need them just to get a feel of how things should go.

Otherwise, these were delicious. My personal favourite would be chocolate cake with chocolate coating :D, but these were pretty good too. The colours were pink and baby blue and we primarily just used those colours as accents to the white and burlap we used for decoration. It turned out very nice!

I was out hopping garage sales when I came across Bakerella's book Cake Pops. That's when I knew I had to include them in the Wedding Dessert Repertoire.

I'm giving you the basic recipe here, but if you go to her website, Angie has a lot more tips, photos, recipes, and inspiration to create your own one-of-a-kind treat. These Minions are SO cute!


{Basic} Cake Pops
Cake Pops by Bakerella

You will need:

18.25 oz box cake mix {chocolate, yellow, white etc.}
9-by-13-inch cake pan
large mixing bowl
16 oz. container ready-made frosting
large metal spoon
wax paper
2 baking sheets
plastic wrap
48 oz {3 pounds} candy coating
deep, microwave-safe plastic bowl
48 paper lollipop sticks

How To:

1. Bake the cake as directed on the box, using a 9 by 13 inch cake pan. Let cool completely.

2. Once the cake is cooled, get organized and set aside plenty of time {a couple hours} to crumble, roll, and dip 4 dozen cake pops.

3. Crumble the cooled cake into a large mixing bowl. you shouldn't see any large pieces of cake.

4. Add 3/4 of the container of frosting {you don't need the rest} and mix it into the crumbled cake using the back of the metal spoon, until thoroughly combined.

*If you use the entire container of frosting, the cake will be too moist and you will pull your hair out trying to get these to work.*

5. The mixture should be moist enough to roll into 1+1/2 inch balls and still hold a round shape. After rolling the cake balls by hand, place them on wax paper-covered baking sheets.

6. Cover with plastic wrap and chill for several hours in the fridge or in the freezer for about 15 minutes. You want the balls to be firm--don't freeze.

*Oh, by the way...make sure you have room in your fridge prior to making these :)*

7. Place the candy coating in a deep, microwave-safe plastic bowl. Melt the candy coating following package instructions. Don't overheat!

It's dipping time!

8. Take a few cake balls at a time out of the fridge/freezer to work with. If you had'em in the freezer, move them to the fridge at this point so the rest don't freeze.

9. One at a time, dip about 1/2 inch of the tip of a lollipop stick into the melted candy coating, and then insert the stick straight into a cake ball, pushing it no more than halfway through.

10. Holding the lollipop stick with cake ball attached, dip the entire cake ball into the melted candy coating until it is completely covered and remove it in one motion. Sake sure the coating meets at the base of the lollipop stick. This helps secure the cake ball to the stick when the coating sets. The object is to completely cover the cake ball and remove it without submerging it in the coating more than once. A small, deep plastic bowl is helpful during this step.

11. When you remove the cake pop from the candy coating, some excess coating may start to drip. Hold the cake pop in one hand and use the other hand to gently tap the first wrist. Rotate the lollipop stick if necessary to allow the excess coating to fall off evenly, so one side doesn't get heavier than the other.

12. Repeat with the rest of the cake balls

13. Store the cake pops in an airtight container on the counter or in the fridge for several days.

Enjoy and have fun!!


'Member, if you want more details or pictures of the steps, head over to Bakerella's website :).


*PS. I'm doing posts on recipes I've tried {mostly from my cookbooks} and either enjoyed, or hated. I do include websites or links to particular cookbooks, but that is more for clarification and because I totally love them. I've not been asked by anyone for endorsement. Just so we're all clear on that :D
Thanks!*

Tuesday, January 14, 2014

Creamy, Dreamy Oreo Dessert


This is one of the most loved desserts I've ever made.

I'm sure I got the inspiration from somewhere--perhaps my Kraft book??--but I have made it my own way for the last, oh, say dozen times.

It is so incredibly simple, has 4 ingredients, and can be whipped up in no time. The hardest part is allowing it to sit in the fridge for a couple hours to soften the cookie bits.

This dessert is so creamy and LIGHT {texture wise--definitely not in calories!} that it is a perfect complement to a heavy meal.


Creamy, Dreamy Oreo Dessert
Me
Inspired by Kraft

4{8oz} blocks of cream cheese
1 liter whipping cream {use the highest % of fat. I use 35%}
1/2 to 1+1/2 cups icing sugar
Either a package of  Mini Oreo cookies, or a regular pack you break into pieces. In the pictures above, I've just broken Oreo cookies into pieces. 

1. In a bowl, mix the blocks of cream cheese one at a time until smooth.

2. Starting with 1/2 cup of sugar, blend into the cream cheese. Keep adding sugar until it is just a little bit too sweet. Set aside.

3. Next, you'll want to whip your cream until it gets to the "hard" stage. A little bit before it turns into butter :D {I don't add any sugar to my cream...that's why I over-sweeten the cream cheese mixture. In the end, it all works out!}

4. Now, using a third of your whipped cream, gently fold it in your cream cheese mixture. Continue until the whipped cream and cream cheese mixture are fully incorporated.

*Don't beat! Otherwise, you will lose all that fluffiness you just whipped into the whipping cream!*

5. Fold in the Oreo cookies/pieces. Transfer into a trifle bowl and decorate with more cookies/pieces!

You can either eat it right away, or chill in the fridge until you are ready to eat. It's all a matter of whether you want your Oreos to be crunchy or soft. I've always taken it to church, so mine sit in the fridge for at least 2 hours.

Either way, I hope you enjoy!!


I had buttered chicken for my first meal in my new apartment...one of 3 I've made for myself :P

See, I do eat real food...once in a while {I ate leftovers for at least a week! I really have to find me a cookbook for 1 person meals} :D


On a side note...it was really, really, really good. I didn't mind the leftovers. :)

Thursday, July 11, 2013

Homemade Chicken Burgers

I love cooking new things and making up my own meals--either a new creation or a fabulous re-make on an old. Cooking, in my opinion is SO much more forgiving than baking. You can throw in a pinch of this and a pinch of that...or a cup of this and a cup of that...for most dishes, there is no difference if you alter the recipe {whereas, with most baking recipes, precision and accuracy are encouraged for yummy tasting and looking desserts :D}

Anyway, a friend of mine is headed back to the Island {Victoria, BC} with her husband and kids for vacation, and last night was the only time we could fit in a visit before she leaves--on Friday morning! They live about an hour and half from town, so it was [past] supper time before I made it out to their hobby farm.

Since she had ground chicken, I suggested we make chicken burgers.


Tosh mixed the chicken, bread crumbs, 1 egg, fresh garlic, minced onion, and some herb&garlic seasonings--before shaping into patties and placing on a heated pan that had a little bit of oil.


She sliced up some avocado...


and tomato for hers...


I kept it simple with just a bit of mayo and pickles :D


Tosh thought pickles sounded good too...


and mustard!

And, instead of using bread, I put mine on a bed of lettuce and Tosh wrapped hers in lettuce.

Really, you can put whatever you want on your burger...it will taste good, no matter what!


I love the drive out to their place. The scenery is breath-taking, whether summer or winter. Yesterday we had dark clouds most of the day and a little bit of rain. In the midst of a dark and angry sky, this little puff of cloud was snow white. It made me smile so I had to stop and take a picture! Good thing the roads out there aren't too busy!