Pages

Thursday, March 27, 2014

Thursday Treats: Toffee Bars {Betty Crocker}

I was looking for something both simple and quick because I didn't have very much time before our Thursday night Bible study and Prayer night, and these Toffee Bars fit the bill.


Actually, they might've been too easy because I messed up in the first step. I let my mind wander and put the egg in before separating the yolk and white.


It was ok though, because I quickly found another use for my "mess-up" and started over again on these. I paid attention to the egg part...


...but not to the butter. I was wondering why my mixture was so dry and crumbly and kept going over the list of ingredients. Egg, butter, sugar, vanilla, flour, salt...simple line-up and all there. Oh! But wait...I needed two sticks of butter, and I...I only put in one.


Ooops! Good thing I'm pretty ;)


Anyway, there wasn't very much else I could mess up on and if this recipe turned out a fail...it would be no fault of Betty but my own.


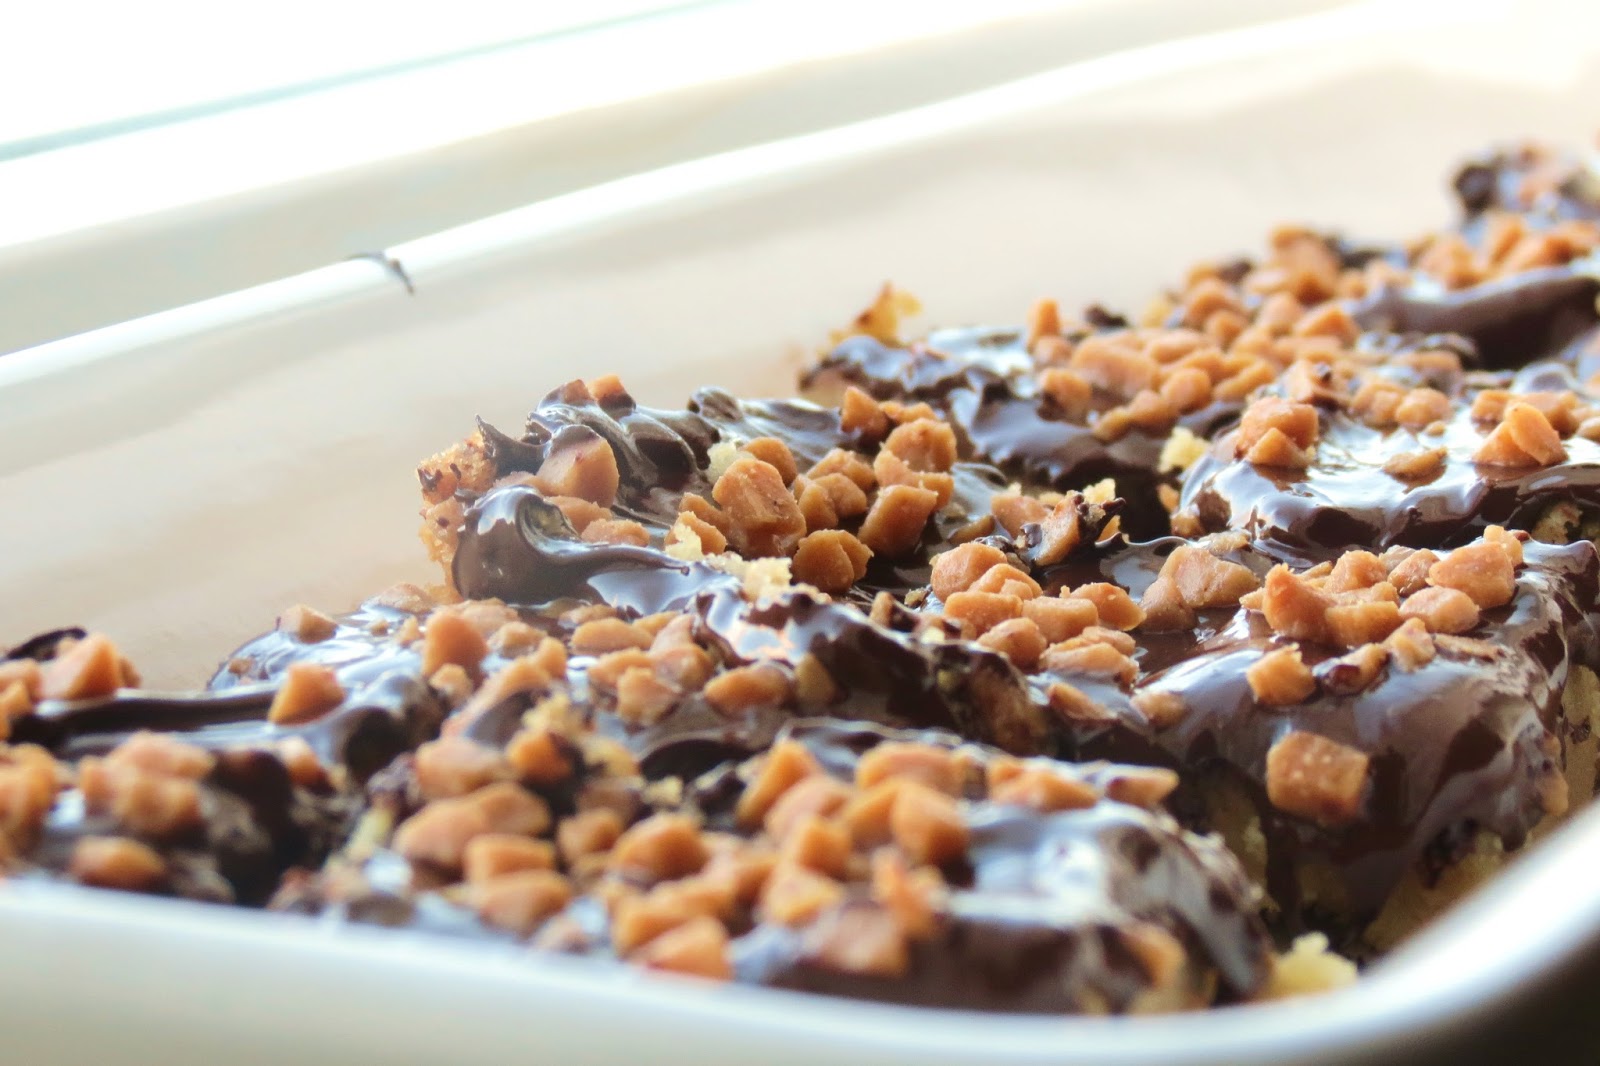
They were a success. Soft, shortbread type of crust with enough chocolate  to make it good but not sickeningly sweet. I subbed out the milk chocolate chips {I used those in my rescued mess-up!} for semi-sweet. I also added toffee bits to the top instead of nuts. Whether you make them with my substitutions, or as the original, I'm sure you'll love these treats.


Toffee Bars
Betty Crocker, Baking Basics

1 large egg, separated
1 cup butter, room temperature {2 sticks :)}
1 cup packed brown sugar
1 tsp vanilla
2 cups flour
1/4 tsp salt
2/3 cup milk or semi-sweet chocolate chips
1/2 cup chopped nuts or toffee bits

1. Heat the oven to 350.

2. In a large bowl, place egg yolk, butter, brown sugar and vanilla and stir with a wooden spoon until well mixed.

3. Stir in the flour and salt until mixed. Using your fingers, press the dough firmly and evenly on the bottom of an ungreased 13x9 pan.

4. Bake 25 to 30 minutes or until very light brown {the crust will be soft}.

5. Immediately sprinkle the chocolate chips over the hot crust. Let stand about 5 minutes or until chocolate has softented; spread chocolate evenly over bars, using a metal spatula. sprinkle with the nuts and/or toffee bits.

6. Place pan on cooling rack. Let stand 30 minutes before cutting.

7. Share and enjoy!


There are no calories in these bars because you burn them off mixing the dough by hand.

Therefore, go. Make and eat :)


Wednesday, March 26, 2014

Timeless Treasures: Suspense + Contests

T is getting down to the last week or so before she has her baby boy!! I'm super excited for them and I know they can't wait to welcome Baby U :D


T says the baby always kicks R when he falls asleep on T's lap :)


A Timmies is always refreshing!


Baby likes French Vanilla too!! He was KICKING after he had a taste of that! :P


My friend, Sarah over at The Crazy Tailor, is an amazing seamstress who is in a contest called Project Run & Play. There are 6 contestents who sew their hearts out making the best outfit possible for their little {or big!} munchkins. There are different themes each week for 4 weeks--Put me in the Zoo! is the theme for this first week and the posts are up for voting! Pick your favourite and vote! {I'd love it if you voted for my friend!!} If you head over to PR&P, you can see the hard work all the ladies put into their outfits and even be inspired to dust off your sewing machine and create something beautiful. {Incidentally, there is also a "sew-along" contest, so if you are handy with needle and thread--submit your work! I'm thinking of doing one for the signature week, because I've been inspired by the amazing work from the last couple seasons!}


E wearing his cute outfit. Doesn't even look homemade :D

Thursday, March 20, 2014

Thursday Treats {Pinterest}: Carmelitas

I had wanted to make these last Thursday, but didn't get around to it until the weekend. I made these for our church potluck on Sunday.


And, because Ema Boo reminded me of this pin that I've had on my board for a long time!


The recipe comes from Melissa over at Lulu the Baker. She writes a funny post of entering these into a contest expecting to win but losing to white chocolate & cranberries oatmeal cookies.


If I had been a judge, I would've picked these as winner. More so because I'm not fan of white chocolate OR dried cranberries, than being totally in love with these bars.


These bars were...good, but not my favourite. I loved that they were simple to make with ingredients I had on hand. These are quite rich and one small piece is quite enough. I did add salt to my cream/caramel mixture and that helped cut back on the sweetness.


I think the biggest thing for me was that it was almost too sweet to actually enjoy it. I think if I make this again, I'll probably use dark chocolate and add a bit more salt to the caramel layer. Or, as one of my friends suggested, use apple pieces instead of the chocolate.


Overall, it's a good recipe and one that I would make again. It IS delicious when eaten in small quantities though, so I don't think I'd double the recipe again.

Caramelitas
Melissa @ Lulu the Baker
Pinterest

32 caramel squares, unwrapped
1/2 cup cream
3/4 cup butter, melted
3/4 cup packed brown sugar
1 cup flour
1 cup rolled oats
1 tsp baking soda
6 oz semisweet chocolate chips

1. Combine caramels and cream in a small saucepan, stirring over low heat until smooth. Set aside.

2. In a bowl, combine the butter, sugar, flour, oats, and baking soda.

3. Pat half of the mixture into an 8x8 pan; bake at 350 for 10 minutes.

4. Remove pan from the oven and sprinkle the chocolate chips over the crust and then pour the caramel mixture on top.

5. Crumble the remaining oatmeal mixture on top of the caramel and return the pan into the oven for 15-20 minutes or until the edge is lightly browned.

6. Remove from the oven and let the bars completely cool before cutting into squares.

7. Enjoy with a tall glass of ice cold delicious {chocolate} milk while reading the original post here :)


Wednesday, March 19, 2014

Timeless Treasures: Library Fun


This past Saturday, Sarah, Theresa and I took the kids to the Library. Sarah wanted to take some pictures of her little boy for Project Run & Play {So EXCITED for this season!!} and our library is really big with gorgeous lighting from the many windows.


After we finished taking the pictures out in the cafeteria part, we went to explore the children's section of the library. J loves to read and look at books so she picked one out for me to read.


This one was a listen-along book and she was pretty fascinated with the disk "you play on Daddy's computer" :)

*********************


E was thrilled to be crawling in such a big open space as our library :) You'll have to check out the new season of PR&P {starts THIS Monday--March 24th!!} for the adorable shots Sarah captured of her little boy wearing the cutest clothes she made for him. The whole outfit looks like it came from a store--she did such a good job! I'm really excited to see the other contestants entries as well--I'm amazed at the creativity of those who enter the contest!

***************************

J and R found the computer station and were captivated by the book being played.


Until R decided he like feeling the book in his hands :)


T playing with her little boy....he would just laugh and laugh--so cute.


"Whoa Mom! Look at her eyes! They're huge!!" R wasn't particularly thrilled about checking this one out for movie night ;)

We all had so much fun! I love going to the library, on my own or with friends :)

Thursday, March 6, 2014

Thursday Treats: Pumpkin Bars {Better Homes and Gardens Magazine}

Alright, technically, this recipe isn't from one of my cookbooks, but a special publication of BH&G indulging in the world of brownies and bars. For me, it counts because there are but 1 or 2 ads and the rest is recipe love--120 of'em.


Anyway, these are SO simple to make and absolutely delicious {with my modifications}. I made a batch on Tuesday night to take for dessert at a supper with friends, and although good--it was a little bit bland tasting. So when I made a batch this afternoon to take to church {and gift some :}, I upped the salt and cloves.

That's all it took to take this recipe to great to out-of-this-world. They are very soft and moist and have the perfect blend of spices.


And the browned butter frosting? Mmm, YUM!

In my opinion--as good as the frosting tastes--I prefer these in their un-adorned perfection :D


Pumpkin Bars
Better Homes and Gardens Special Interest Publications: Brownies & Bars

2 cups flour
1+1/2 cups sugar
2 tsp baking powder
1 tsp baking soda
1 tsp salt
2 tsp cinnamon
1 tsp ground cloves
1-15 oz can pumpkin
4 eggs
1 cup vegetable oil
Browned Butter Frosting

1. Pre-heat oven to 350F. In a large bowl, whisk together flour, sugar, baking powder, baking soda, salt, cinnamon, and cloves.

2. In a smaller bowl, lightly beat the eggs, pumpkin, and oil. Stir into the dry ingredients to combine. Spread batter evenly in an ungreased 15x10x1-in pan.

3. Bake for 25 minutes or until toothpick inserted in the center comes out clean. Cool in pan on a wire rack.

4. Spread with Browned Butter Frosting. Cut into bars. Enjoy!

Browned Butter Frosting

In a small saucepan, heat 1/3 cup of butter over low heat until melted. Continue heating until butter turns a golden brown. Remove from heat. In your mixing bowl attached with whisk attachment, combine 3 cups of powdered sugar, 2 tablespoons milk, and 1 teaspoon vanilla. Add the browned butter and beat on low speed until combined. Beat, on medium to high speed, until spreading consistency. Add more milk as needed.